Why learn Vim?
You don’t need to learn Vim to be a great developer.
The ability to write well-designed software and communicate to stakeholders is far more important.
But Vim will eventually improve the efficiency of how you edit code.
Vim will appeal more to those who are constantly looking for ways to improve their workflows and thinking about how to do things differently.
Here are two of my favourite quotes from The Pragmatic Programmer for inspiration:
“Tools amplify your talent. The better your tools, and the better you know how to use them, the more productive you can be”
“Most time is spent editing and adding to existing code. This is essentially text manipulation. You need to be able to manipulate text as effortlessly as possible – this is the basic raw skill of programming.”
I find the major gain from becoming fluent in a text editor such as vim is that you no longer have to think about the mechanics of editing. You can edit at “the speed of thought” enhancing your productivity and creativity (see my other article on typing speed ).
Additionally, Vim is ubiquitous, cross-platform, lightweight and customisable. After learning the basics of Vim you will have a powerful and fast text editor available to you on any system. Removing the need to download a heavy IDE program in order to make edits to files with any level of efficiency, increasing your versatility as a developer.
Why is Vim so hard to learn?
Vim is an excellent tool but it comes with a notoriously steep learning curve.
When starting out with Vim I stumbled across the following road blocks:
- Seemingly simple editing tasks are impossibly hard and unintuitive in Vim. For example: exiting Vim, creating new files or even copying text to your system clipboard.
- When you forget a keybinding and get stuck, there is no GUI to bail you out. This kills any productivity.
- Basic features of modern IDEs are missing making it impossible to code productively. For example: syntax highlighting, linting, and code completion. Any attempts to configure these features leads to hours of debugging and head scratching.
At this point, I thought Vim was too much effort to learn and wondered why anyone would possibly spend the time to learn such an onerous tool. I retreated to the comfort of my IDE and left learning Vim to another day.
I tried on several occasions to incorporate Vim into my workflows but never cracked it.
You might be in a similar situation and have chanced upon this article looking for a better way to overcome these barriers.
In this post I want to present a strategic stepwise approach to learning Vim to increase your chances of successfully incorporating it into your workflow and benefit from the productivity boost it brings.
My key message is:
You don’t need to be a master of Vim to benefit
Focus on learning and applying the Vim keybindings to your daily workflow (via your normal IDE) and then gradually build up your configuration to achieve your perfect lightweight IDE for ultimate productivity.
How to learn Vim
When thinking about learning Vim, I see there being two parts:
- Modal editing and keybindings – a set of powerful keyboard shortcuts for editing text effortlessly without touching your mouse
- The text editing environment – the Vim editor configurations to build the ultimate customisable development environment
It is easy to conflate the two when starting out with Vim. Increasing the already sizable learning curve.
I think it is important to separate these two functions and tackle them independently in order to stand the best chance of learning and sticking with Vim.
Below is my two cents on how to approach learning Vim and incorporating it into your workflow. Unfortunately your productivity won’t dramatically increase overnight but it is 100% worth the effort investment if you edit code for a living.
Understand the basics of modal editing and learn a small number of keybindings
The first step you should take is just to learn the basic concepts of modal text editors and the basic set of Vim keybindings required to make simple edits to text files.
Watch a video introducing Vim and modal editing
Vim is a modal text editor with three modes: normal, insert and visual.
Modal editing can be an alien concept to begin with. You need to get used to pressing keyboard characters that don’t actually write anything on your screen.
There is an excellent video on the 'Missing Semester' YouTube channel that provides an introduction to Vim and modal editing – well worth watching.
Learn keybindings using Vimtutor
For getting to grips with the keybindings I highly recommend using Vimtutor – Vim’s inbuilt tutorial.
The vimtutor can be accessed by simply typing Vimtutor into your terminal (if vim has already successfully been installed).
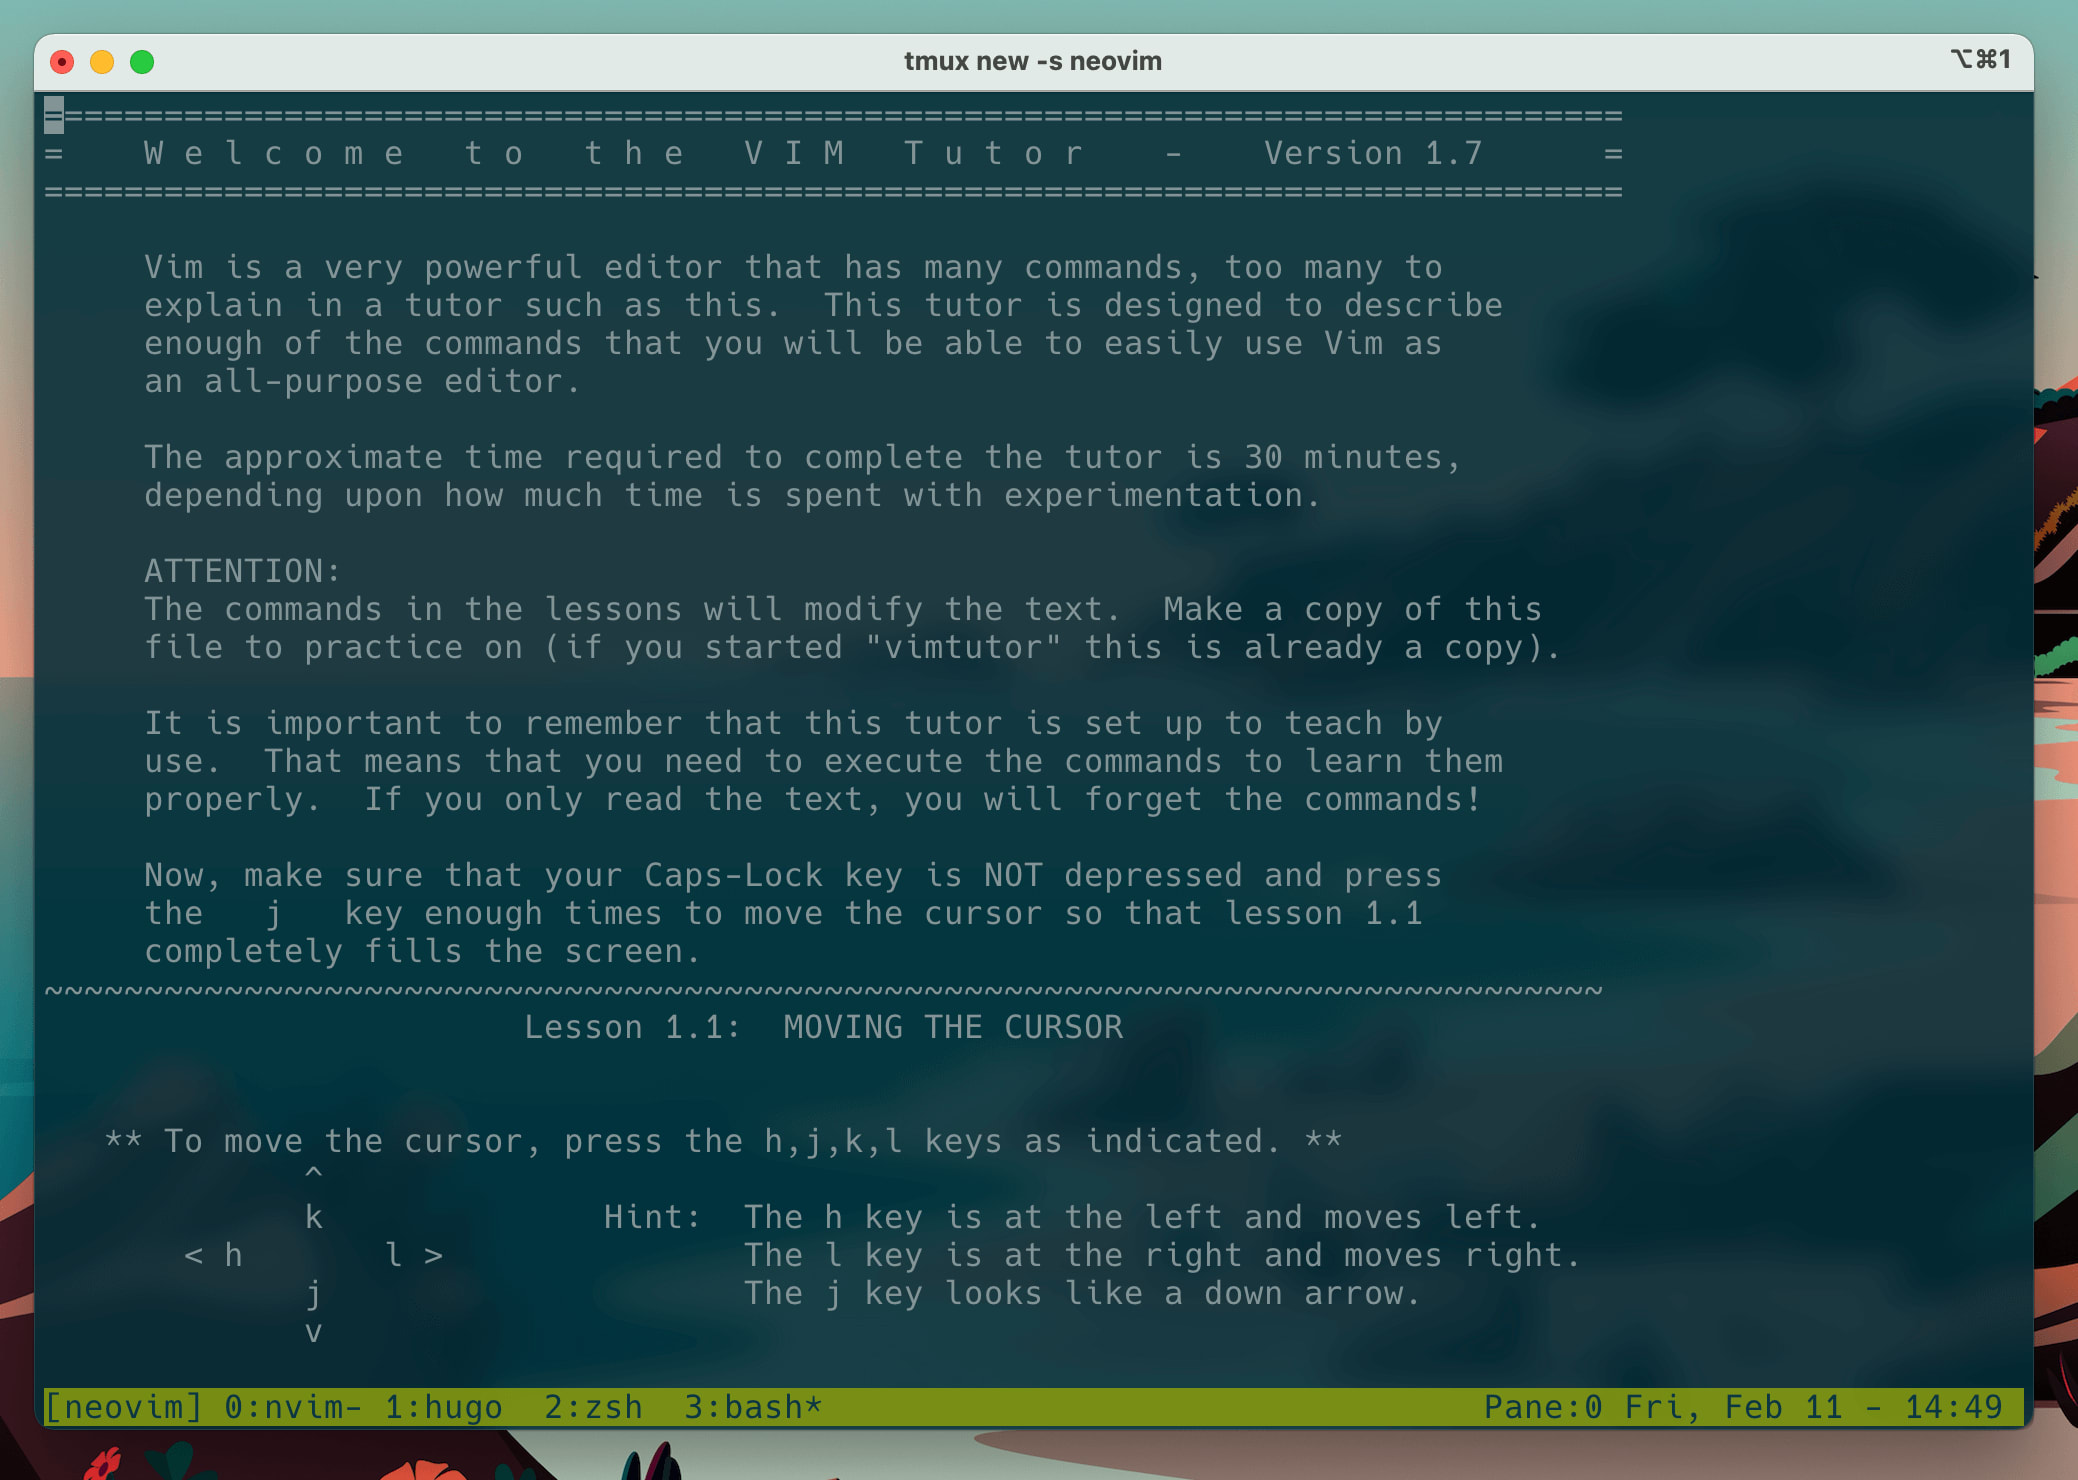
Don’t let the minimal UI put you off. The Vimtutor is an excellent resource comprising of seven lessons that walk you through everything you need to know to start editing text with Vim. After working through and practicing these lessons you will have made a giant leap forward in your Vim skills.
While it might seem like there is an infinite number of keybindings to remember, you can actually get a long way with learning just a few commands. Focus on getting used to navigating within files using h,j,k and l, then simple editing commands like diw (delete the current word), ciw (delete current word and enter insert mode) and ci" (delete within the quotes and enter insert mode.
Keep a keybinding cheatsheet close by
When you do forget a keybinding, make sure you have a cheatsheet easily accessible to look it up.
This Vim cheatsheet is an excellent resource to keep handy or even print off (if anyone still owns a printer).
Practice makes perfect
Whichever resource you choose for learning Vim, try and repeat the exercises as many times as necessary to start building muscle memory.
Don’t go ‘full Vim’ – Enable Vim keybindings in your IDE first
A common mistake is trying to replace your fully featured IDE straight away which will inevitably lead to a miserable coding experience.
I believe the two most difficult things with Vim when coming from code editor are:
- Development environment configuration (e.g. setting up syntax highlighting, linting, code completion etc.)
- Project navigation (e.g. finding, creating, opening new files)
Vim’s main keybindings themselves are not that difficult to remember with a bit of practice. But trying to configure Vim to behave like a fully featured IDE with syntax highlighting, linting and code completion takes a lot of time and pain in debugging.
Additionally, navigating large code bases without the friendly file tree in the sidebar can feel like trying to ride a bike without stabilisers for the first time.
Therefore I recommend you start by enabling Vim keybindings in your IDE. For example, VSCode has a Vim extension which allows you to use Vim keybindings.
In the early stages of learning Vim you should focus on learning the keybindings. Ultimately, using keybindings to edit text is the main reason for using Vim and where you will receive the most benefit in the shortest amount of time.
Enabling Vim keybindings in your favourite IDE will allow you to focus on learning the keybindings in a familiar environment without having to reconfigure your environment from scratch. If you get stuck or are time limited you can either disable the keybindings or use your mouse in the GUI.
Using Vim keybindings within a code editor might be the sweet spot for most people as it greatly increases productivity without going down the endless rabbit hole of vimrc configuration.
Practice by making small edits to config files from the command line
Once you are floating effortlessly around your code files using Vim keybindings in the IDE, you should start using Vim to make edits to simple individual files. For example, Dockerfiles, YAML config and README.md files.
Don’t worry too much, if at all, about trying to configure the Vim editor with the vimrc at this stage. These simple text files are generally quite small and don’t really need syntax highlighting or code completion in order for you to edit them efficiently.
The main point of this stage is to get familiar with editing files from within the terminal application. This is where you will probably experience for the first time the productivity improvements from being able to use a command line editor to make quick changes to files without needing to load up your heavy IDE application.
Start using Vim entirely for low risk small/medium side projects
You will inevitably experience a dramatic drop in productivity when you initial start using Vim for your projects. Don’t try using Vim for paid projects or at work when you have tight deadlines. You should try and learn in a ‘low risk’ environment.
A couple of years ago I used the Advent of Code competition to challenge myself to use only the Vim editor to answer the questions. I found this was a great exercise as the code to solve the puzzles was relatively simple so I could put more focus into how I was able to edit the text and other files using Vim.
Alternatively, you could use a small side project where a slow down in productivity isn’t going to be an issue for making client deadlines.
Using Vim for small projects like this will help practice navigation not just within a file, but also within a wider project. You will get used to using Vim more like you would for your IDE.
Build up your Vim configuration file incrementally
Ok, now we get to the configuration of the Vim editor.
Vim’s best and worst attribute is that you have ultimate configurability
Advanced warning: You will lose countless hours researching plugins and debugging to get your perfect development environment.
If I’m honest, you probably won’t ever get this time back. That’s why I suggest leaving it to this point when you have pretty much committed to using Vim as your IDE.
It is common for people to post their Vim configurations on GitHub (mine can be found here ) or YouTube.
These can be really useful resources for finding inspiration for your own configuration. However, I would caution that you should not blindly copy other people’s configuration in their entirety. The configurations are very personal to an individual’s workflow and is probably full of bugs caused by hidden dependencies which are not immediately clear.
Instead you should use these sources of information as inspiration and ideas for issues you want to solve. Only copy across the individual piece of functionality you want to achieve.
One of Vim’s key selling points is that it is lightweight. Don’t bloat your configuration with unnecessary plugins and custom keybindings you never use.
The best tutorial I have found for setting up neovim as an IDE environment is from Takuya Matsuyama – I highly recommend checking out his article on Medium .
Takuya splits out his vim configuration line by line making it easy to understand the purpose of each component in his workflow.
Learn project navigation
Next, step up your ability to navigate larger project code bases.
Navigating large project bases was one of the main blockers for me to adopt Vim as my main editor for a long time. I was accustomed to a friendly file tree navigation sidebar for browsing and creating new files in my projects. Losing the file tree was initially a big issue for me. Additionally, I liked having multiple files open in tabs. In Vim, recently opened files are saved in ‘buffers’ which are hidden by default and it was frustrating to work on multiple files in Vim and ‘lose’ the files somewhere in the hidden buffers.
I believe navigating projects using Vim takes a different mindset
Of course it is possible to use a file tree in Vim with the Nerdtree plugin .
You should use tools such as FZF and telescope to navigate your projects.
Learn the tools and shortcuts available to you. I absolutely love using telescope. Once I set that up I said goodbye to the sidebar file tree for good 👋.
Push through the productivity slump
Now you have really committed to Vim. You are dancing around the terminal and starting to experience the awesome power of the tool.
However, there will be frustrations when seemingly simple tasks are less straightforward in Vim than a normal GUI IDE.
When you get stuck, make a point of finding out the Vim way of doing things and write the answer down for future reference.
Conclusion
I started my journey with Vim about 18 months ago, inspired by boredom during various lock-downs.
After four failed attempts at learning I finally adopted Vim for my workflow by separating learning the keybindings from configuring the terminal editor.
You don’t need to master Vim in order to find benefit. Enabling Vim keybindings in your normal IDE and using a few basic commands will dramatically increase your productivity and the comfort of editing code.
Configuring the Vim editor to behave like a modern IDE is time consuming but worth the effort if you persevere and build it incrementally.
Will I ever recover the countless hours spent down the rabbit hole configuring Vim? Probably not. But have I transformed the way I use the terminal and the pleasure I get from editing code without having to touch my mouse? Absolutely.
Good luck!
Great Resources for Learning Vim
- Vim Cheatsheet
- Tips from the Vim Wiki
- Getting started with Vim - Daniel Miessler
- A reflection on using Vim for three years by Jiedong Hao
Further Reading
- How to set up an amazing terminal for data science with oh-my-zsh plugins
- Data Science Setup on MacOS (Homebrew, pyenv, VSCode, Docker)
- Five Tips to Elevate the Readability of your Python Code
- Automate your MacBook Development Environment Setup with Brewfile
- SQL-like Window Functions in Pandas
- Gitmoji: Add Emojis to Your Git Commit Messages!
- Do Programmers Need to be able to Type Fast?
- How to Manage Multiple Git Accounts on the Same Machine