What is Dremio?
Dremio is a really interesting technology which allows you to query data in a data lake using SQL.
Traditionally, data has needed to be ingested into a data warehouse before it can be analysed. However, this can be time consuming and costly as you need to involve data engineers to build and monitor pipelines to ingest the data.
Federated query engines, such as Dremio, allow you to query the data ‘in-place’ using SQL without having to ingest it into a data warehouse or database first. For example, if your data is stored in files in Google Cloud Storage (GCS) you can directly analyse those files using SQL. This helps break down data silos by lowering the barrier for analysing data and also reduces the need to copy or duplicate data for multiple different use cases.
The Dremio software is free , and can be deployed on Kubernetes. When deployed in the cloud, you just pay for your compute resources and storage consumption from your chosen provider.
Deploying Dremio on Google Kubernetes Engine (GKE)
In this post, we will go through the steps for deploying Dremio on Google’s Kubernetes Engine (GKE).
Dremio can be deployed on any Kubernetes cluster. There is some documentation on Dremio’s github for deploying on Kubernetes and there are also step by step tutorials explaining how to deploy Dremio on AWS . However, I could not find any for deploying Dremio specifically on GKE.
I have some, but not a great deal, of experience with GKE/Kubernetes so I had a few issues following Dremio’s generic documentation for installing on Kubernetes and debugging.
Therefore, I have created this guide for how I managed to deploy and test Dremio on Google Cloud – I hope it is helpful to other data engineers!
Disclaimers
Deploying Dremio on GKE requires quite a lot of compute and storage resources. As a result, following this tutorial will incur some costs (running the cluster with the default settings for a full day would cost approx $100). Be careful to delete and clean up resources after completing the tutorial to avoid racking up a large bill.
The tutorial covers how to deploy a Dremio using the default values for resource sizing. There is no discussion on the appropriate resource sizing for performance or different use cases.
This installation works well for a development environment. I am not a cloud security or Kubernetes expert. Further GKE configuration may be needed for a more secure production installation.
Prerequisites
You will need the following installed on your development machine in order to deploy resources on Google Cloud and manage the Kubernetes cluster:
You will also need to create a project in Google Cloud and configure
your gcloud session to access the project.
Create a GKE cluster
The first step is to create a Kubernetes cluster on GKE.
This can be achieved using the gcloud CLI:
CLUSTER_NAME="dremio-benchmark-test"
PROJECT=$(gcloud config get-value project)
ZONE="europe-west2-a"
GKE_VERSION="1.21.6-gke.1503"
MACHINE_TYPE="e2-highmem-16"
NUM_NODES="5"

gcloud container --project ${PROJECT} clusters create ${CLUSTER_NAME} \
    --zone ${ZONE} \
    --cluster-version ${GKE_VERSION} \
    --machine-type ${MACHINE_TYPE} \
    --image-type "COS" \
    --num-nodes ${NUM_NODES} \
    --enable-autorepair \
    --scopes=storage-full \
    --preemptible
More information about the
gcloud containercommand can be found in the CLI documentation
You can change the CLUSTER_NAME, PROJECT, ZONE and GKE_VERSION as appropriate. However, the two most important parameters to pay attention to are the MACHINE_TYPE and NUM_NODES.
If you choose a machine type without enough resources or don’t provision enough nodes, your Dremio deployment will fail.
The default configuration for Dremio requires a machine type with 15 vCPUs and 128GB of RAM. This can be changed before deployment, but you need to make sure you have provisioned a machine type that can handle this requirement. On Google Cloud the E2-Highmem-16 machine will meet this default requirement.
It is also important to set the --scopes=storage-full option when creating the cluster which allows the cluster read-write access to GCS.
After running the command, wait a few minutes for the cluster to be created.
Download Dremio Cloud Tools
Dremio have provided a git repository containing the helm charts and configurations needed to deploy Dremio on Kubernetes.
Clone the repo to your local development machine and navigate to the dremio-cloud-tools/charts/dremio_v2/ directory.
git clone https://github.com/dremio/dremio-cloud-tools.git

cd dremio-cloud-tools/charts/dremio_v2/
Update the values.yaml file
The dremio_v2 folder contains the helm chart and templates required to deploy Dremio.
The important file that you need to change is the values.yaml file which contains the configuration for the deployment.
I highly recommend reading the values.yaml reference file
for information about each option.
To get a baseline Dremio installation going, the only values you need to change is the distributed storage location from Dremio’s application files and the loadbalancer config.
Configure Storage Location
The storage configuration is defined in line 281 of the values.yaml file.
To use a GCS bucket for distributed storage you need to set the “type” to “gcp” and specify the name of a GCS bucket (“bucketName”) to use for storing application files (you can leave the “path” as “/").
The final part is to specify an authenication method to allow Dremio to read and write files to this GCS location. The “auto” method will use any Google credentials stored in your local environment. For example if you have already authenticated your terminal using gcloud auth login. Alternatively, you can specify a service account key which would be preferred for production deployments.
For example:
Note: You will need to create the GCS bucket yourself before deploying Dremio. The helm charts do not automate the creation of the bucket.
Loadbalancer (optional)
By default, the Dremio UI will be accessible via your cluster’s external IP address.
If you want to restrict access only to the cluster’s internal IP address (i.e. use port-forwarding from an authenticated machine), you need to enable the “internalLoadBalancer:true” flag in the values.yaml config . This flag is not set by default.
If you are happy to access the Dremio UI via the external IP, you can leave internalLoadBalancer commented out.
Deploy Dremio using helm
Before deploying Dremio, you need to first connect and authenticate to the newly created GKE cluster. This can be achieved with the following command:
gcloud container clusters get-credentials <CLUSTER_NAME> --zone=<ZONE>
Next, deploy Dremio using helm.
# naviagate to dremio_v2 directory of cloud tools repo
cd dremio_v2

# deploy dremio
helm install dremio-test .
It will take a couple of minutes for the deployment to complete. You can keep track of the progress using the following kubectl commands:
kubectl get pods

kubectl get services
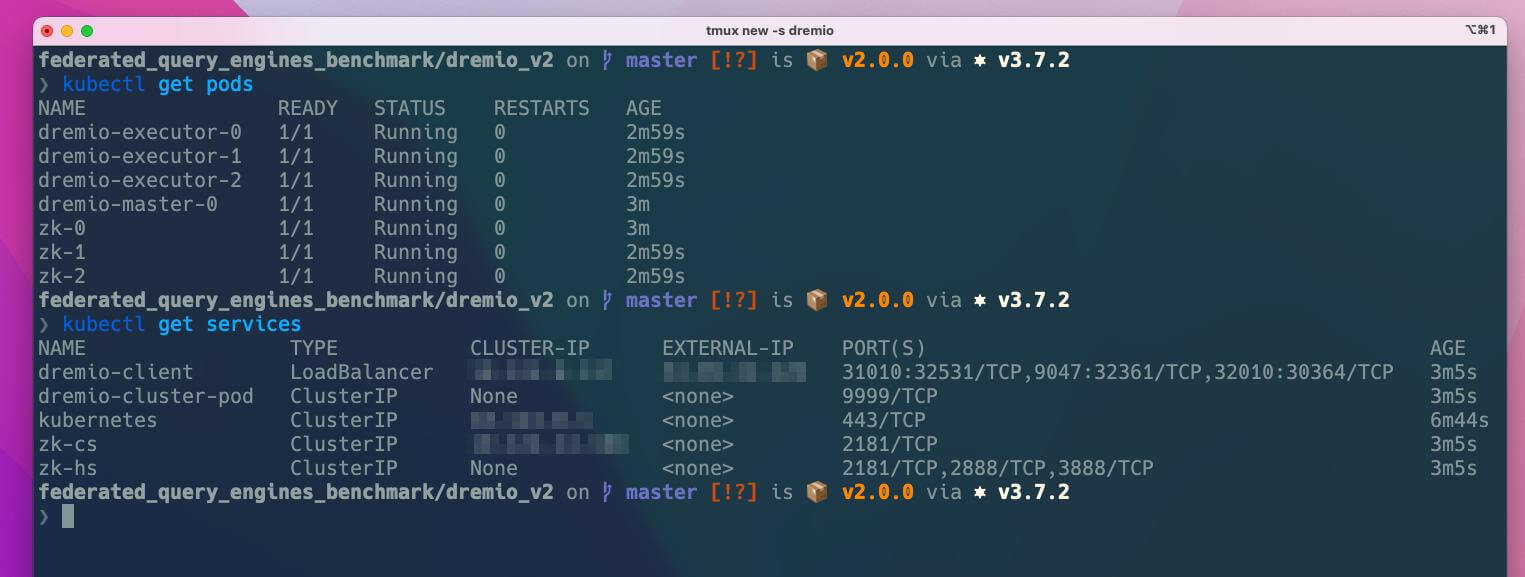
When each of the pods show READY and STATUS = Running, the deployment has successfully completed.
If you do get any errors, you can debug using the error logs using the following commands:
kubectl describe pods <POD_NAME>

# show error logs (if there are any)
kubectl logs -p <POD_NAME>
The main challenges I faced when deploying Dremio for the first time were:
- Insufficient compute resources: this was fixed by increasing my machine type to E2-Highmem-16
- Authentication errors with GKE not having access to GCS: this was fixed by adding
--scope=storage-fullto my initial GKE deployment command
Hopefully, by following this tutorial you should not get the same issues.
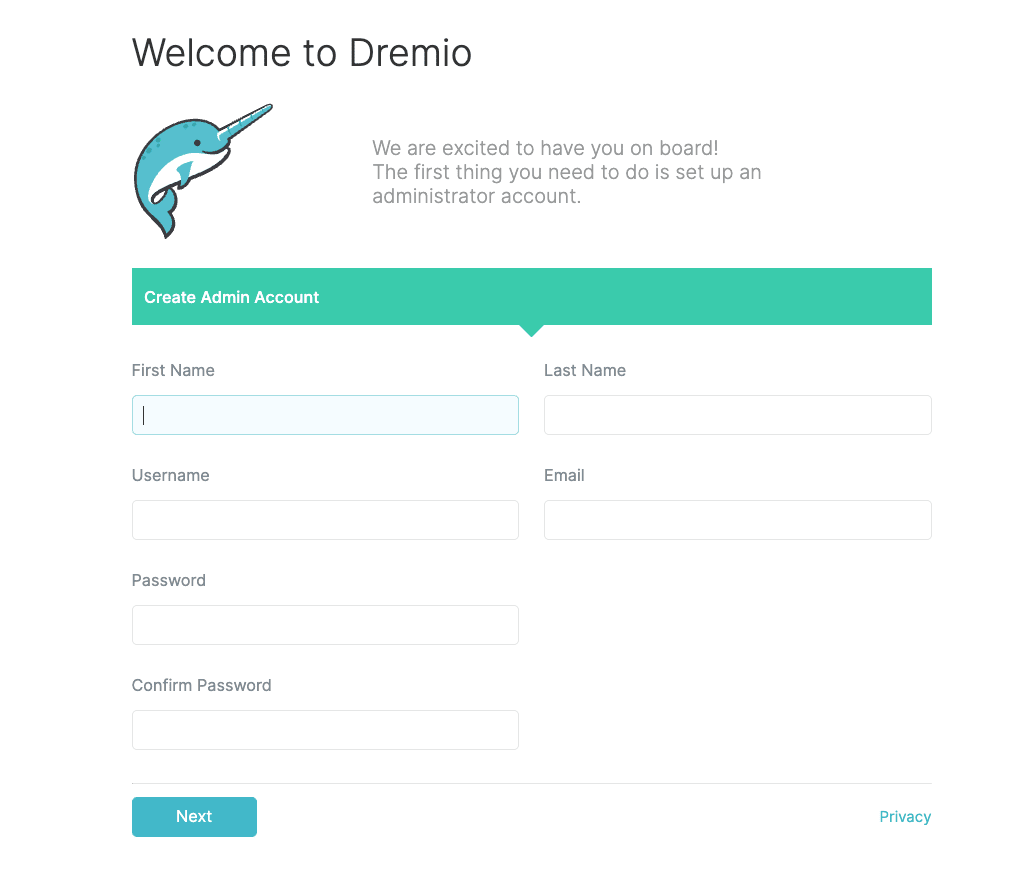
Access the Dremio UI
Once the deployment has completed successfully you will now be able to access the Dremio UI which is served by the dremio-client service.
If you did not enable the internalLoadBalancer flag, you can access the UI at the cluster’s external IP address. The external IP address can be found using the following command:
kubectl get services dremio-client

The UI is available at port 9047. Open your browser and copy in the external IP address and port number to show the UI (e.g. http://EXTERNAL_IP:9047)
If you did enable the internalLoadBalancer:true flag, the UI will not be accessible from the external IP. Therefore you need to enable port-forwarding from the cluster to your dev machine in order to access the UI. This is achieved using the following command in your terminal:
kubectl port-forward dremio-master-0 9047:9047
You can now access the UI at localhost:9047
There we have it. Dremio deployed on GKE. Enjoy!
Clean up
Remember to clean up and delete your GKE cluster if you are not using it in order to reduce your costs. You can delete the cluster in the Google Cloud Console UI or using the gcloud CLI .
Additionally you will need to delete any compute disk storage which was allocated to your cluster. You can check which compute disks are allocated using the following command:
gcloud compute disks list
You can use the following command to delete all disks which contain the word ‘dremio’ in their name:
gcloud compute disks list | grep dremio | awk '{print $1;}' | xargs gcloud compute disks delete
Resources
Further Reading
- Reproducible ML: Maybe you shouldn't be using Sklearn's train_test_split
- Why is machine learning deployment so difficult in large companies
- How to set up an amazing terminal for data science with oh-my-zsh plugins
- Data Science Setup on MacOS (Homebrew, pyenv, VSCode, Docker)
- Five Tips to Elevate the Readability of your Python Code
- SQL-like Window Functions in Pandas
- Do Programmers Need to be able to Type Fast?
- How to Manage Multiple Git Accounts on the Same Machine